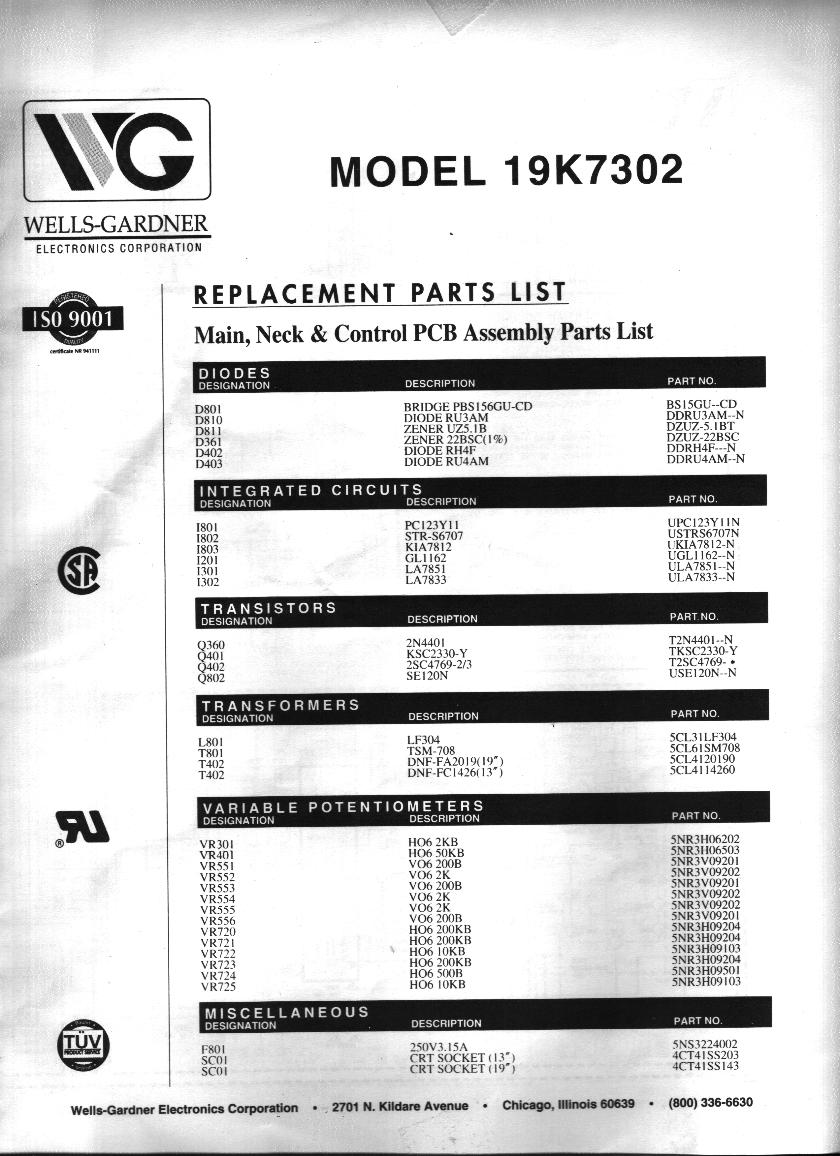
| Pinball2000 Monitor Informations and Problems:
version 2.15; add monitor Markus Pautz
0) General Information
1) Degaussing Problems I
2) Degaussing Problems II
3) Beam does not switch off
4) Totaly broken
5) Brightness Adjustment
6) Replacement Alternatives
7) Replacement Alternatives 2004
8) The Monitor Schematics Ducksan/WG
9) Wells Gardener Horizontal Adjust Problems/WG
10) Other variant of Wells Gardener 79K7302 found
0) General Information
The monitors used for Pinball2000 are CGA monitors, which need negative synch
input and are therefore not compatible with all standard monitors!!!
Pinball2000 uses a 19" CGA color monitor with analog signal input on
a 15 pin VGA connector.
This is quite unusual in PC area as the 'old' CGA signal generated by CGA cards came with
a digital Signal on a 9 pin connector.
Up to now I did not find any PC monitor that was able to completely
show the Pinball2000 images. But I heard, that some old VGA monitors are able to display P2K signals (neg. synch).
In addition the vertical deflection is inverted on tube or chassis (for the mirroring).
If you need replacement, you need the specific one or one that has Multisync capabilities.
Enver H. found that a TFT, NEC Multisync 1990FX, is able to display the signal without any modification.
It's a 19" 4:3 TFT monitor that can be found used for reasonable prices. You need to build a mounting frame
to insert the Monitor into the game as it is a bit too small. if someone has done it please show pictures.
See Replacement
Infos
1) Degaussing - 1.
Subject:
Re: RFM degaussing and fipper questions
Date:
Mon, 13 Mar 2000 20:05:12 +0100
From:
Ronald Knor <rjknor@xs4all.nl>
Organization:
XS4ALL Internet BV
Newsgroups:
rec.games.pinball
References:
1
The monitor in a P2K degausses automatically everytime it makes a "cold
start". You can hear this as a short buzzing sound (only a fraction
of a
second) at the moment you switch on the machine.
When you place the machine back in it's first position, the centre of
the
room, has the spot then disappeared? If so then there has to be external
magnetic interference from speakers or (halogen) transformers. Check
if
those are near the machine.
If the spot remains the degauss mechanism is malfuntioning. I advise
you get
expert help and don't try to repair this yourself (high voltages are
present
inside the monitor, even after being switched off).
Good luck!
2) Degaussing - 2.
Hi
If you don't get the hum at the start, there is usually
a varistor that burns out. If the mask gets a reasonable
magnetic field, it may take several power cycles to
clean up ( look out for vacuum cleaners and speakers,
these often have strong magnetic fields ). Don't just
power on and off to de-gauss. Just check after about
5 or so power cycles. If the purity doesn't
come back, you'll have to refer to a shop manual
for the monitor that describes purity adjustments for
your monitor. Even the earth's magnetic field is strong
enough to effect purity of many color monitors.
Dwight
3) Electron Beam not switched off after power off:
Reported by Rob Buisman, NL:
I've a problem with my monitor:
When I turn down the machine there's a blue en red dot about 3 x 7
cm staying on the screen for several minutes.
It's becoming smaller and smaller untill its gone. Nobody can tell
me what the problem is.
Who can give help on that problem?? Please reply
to me!
4) Total Defect.
If the monitor is totally defective and the warranty is over you may
want to buy a new one.
Pinball2000 monitors were delivered by Wells Gardener and Duckscan.
See first page of manuals duckscan
(CGM-1901CW) or Wells Gardener
(19K7302).
Wells Gardener has these monitors no longer on stock Model
number for pinball 2000 was WGZ1973-U3GS35J
I bought several spare monitors and brought them to Europe. I sold
them on a non profit base for my buy price - a total of about 370 Euro.
The alternative is now to convert another WG model to pinball 2000.
See chapter 6) and 7) for Infos.
5) Brightness Adjust.
Remove the backglass and you'll see some small knobs (pots)
mounted on the right side in the head.. One of them is a brightness.
Unfortunately most P2K monitors already have set up brightness to maximum,
as the mirror takes a big portion of the light away. When the monitor gets
older, then this might be no longer sufficent.
There is a an advanced user tip from Stefan Hoppe, if your brightness
is no longer sufficcent. Try it on your own risk and be careful,
as there are very high voltages present at the flyback transformer!
There are 2 turning knobs on the flyback transformer:
One is for focus, the other for the Schirmgitter-Voltage (SG knob).
First find out the one which is not the focus one but the SG knob.
Be careful - only turn knobs with a HV insolated tool / screwdrawer.
Turn the brightness knob (on the little separate adjust board) to a lower value.
Then carefully turn the SG knob for more brightness - if you turn
it too much, then you see flyback lines on the screen!
When you have reached a better brightness you should do a brightness
adjustment with the brightness button.
Again: Do this on your own risk!! There is Danger for you and the game!
6) Replacement Alternatives.
These infos were given to the RGP by Hank (nworker) in 10/2001.
They are valid if you want to use a tube CRT. Using a TFT see hint from Enver in the top of the page.
Hi all,
I have an RFM have been really concerned about what happens if the
monitor goes south. I did a little research that lead me to believe that
replacement monitors are not available, which caused me great concern.
(this is true now, too bad - Martin)
With this in mind I started my PB2000 Monitor Quest and here are the
results. You can replace the monitor with a Wells Gardner 7200 monitor,
but it is not a plug and play adventure.
Here is the url for the 7200 monitor:
WG 7200 Monitor
First the facts:
1. PB2000 was equipped with two different monitors: a Ducksan (what I
have) and a Wells Gardner. From what I have been able to determine
Ducksan monitors are not available and Wells Gardner no longer makes the
monitor model used in PB2000.
2. Two cables were used for each of the different monitor types.
3. If you plugged your PB2000 into a Wells Gardner 7200 monitor it did
not work. It would look like there is some kind of horizontal hold
problem.
The problem turns out to be that in order for the PB2000 to work with
the Wells 7200, you have to switch the pins around on the header to use
the positive sync. On the Wells 7300 the sync pins used did not matter,
rather the negative vs. positive sync was controlled by a jumper of the
monitor chassis pcb.
Here is the pinouts:
Wells 7200 Cable Wiring
15 pin PC Monitor Header
Connector Connector
1 R
2 G
3 B
6 GND-1
13 +HS
14 +VS
10,11 GND-2
Wells 7300 Cable Wiring
15 pin PC Monitor Header
Connector Connector
1 R
2 G
3 B
6 GND-1
10,11 GND-2
13 H/S-2
14 V/S-2
Ducksan cable wiring
15 pin Monitor Header
Connector Connector
1 R1
2 G1
3 B1
5 GND
6 R2
7 G2
8 B2
10 GND-1 (not labeled between GND and V)
13 H/V
14 V
So all you have to do is to change the header connectors to work with
the Wells 7200, swap mounting brackets from the old monitor to the new
monitor, and away you go....
Cheers, Hank
And more info on that thing comes from Jonathan Deitch:
The Wells Gardner 7200 works in Pinball 2000 games.
BUT you will need to rework the monitor cable a bit:
The solution is that the 7200 has different pins for negative
versus positive sync. On the 7300 there is a switch setting on
the chassis board that is set to either negative (the most
common, and how it is set for Pinball 2000), or positive (there
for backward compatability for older video games). Because of
this, the 7300's H/S-2 wire need to be moved to +HS on the
7200 monitor. Likewise, the 7300's V/S-2 wire must be moved to
the 7200's +VS. Also the 7200 should be set to negative sync.
Wells 7200 Cable Wiring Wells 7300 Cable Wiring
----------------------- -----------------------
15 pin PC Monitor Board 15 pin PC Monitor Board
Connector Header Connector Connector Header Connector
1 R 1 R
2 G 2 G
3 B 3 B
6 GND-1 6 GND-1
13 +HS 6,10,11 Key *
14 +VS 10,11 GND-2
10,11 GND-2 13 H/S-2
14 V/S-2
* Yes there is a wire connected to the .156" monitor board
header "key" position. I have no idea why.
This information comes from the Pinball 2000 repair guide.
jdeitch@spamsucks.litz.org (Jonathan N. Deitch) wrote:
Well, K7200 isn't the right monitor (Which is why it doesn't easily work).
K7300 is, however, the EXACT monitor used for P2K and is a drop in replacement
once you change the chassis mount bracket for the custom one WMS used in the
game. Even if WG is no longer making this model, there are still units out
there you can pick up fairly cheaply.
W/the sync mod, K7200 will work fine ... I've used 'em before for testing
P2K cpus.
Jonathan
7) Replacement Alternatives 2004
These infos were given to me from Simon (UK) 03/2004.
Today only a WG 7400 is available at Wells Gardener
Read the mail from Simon about his experience:
Hi Martin,
The monitor that i used was a Wells Gardner
WGE1972-HOGS39L supplied by Wells Gardner for $240 and
$140 shipping to the U.K. It appears to be a very good
product. It doesn't need any warm up time, the colours
are vitually instant. Also the Wells Gardner service
engineer gave the new wire positions on receiving my
order. The ten way molex connector and terminals were
obtained from RS components in the U.K. for $10 these
were used on a computer VGA cable to connect to the
Wells Gardner monitor board, as i kept the duckscan
cable incase i can get the monitor fixed for a spare.
Regards Simon
On the Wellsgardener Website they also explain the replacement
of theyr 19K7302 with a 19K7203. There is a PDF containing
the following information:
PINBALL GAME MONITOR REPLACEMENT
NOTE: The original monitor is model 19K7302 which is part number WGZ1973-U3GS35J.
The replacement monitor part numbers are WGE1972-H0GS39L / WGM1972-H0GS39L
or WGE1972-H0TS49A and these are model 19K7203.
1 Remove the picture tube and the boards from the old monitor frame.
2 Remove the picture tube and the boards from the new monitor frame.
3 Install the new picture tube and boards into the old monitor frame.
4 Modify the original video cable as shown below so it will work with the new monitor.
VIDEO CABLE MODIFICATION
1 Remove wires and contacts from pins 5 and 6 if present.
2 Remove wire and contact from pin 9 and install into pin 5.
3 Remove wire and contact from pin 10 and install into pin 6.
This modification is necessary to get the sync signal to the correct input pins
on the replacement monitor so that the picture will not be out of sync.
C. Rabiola 1/14/05
9500 W. 55th Street, Suite A ?? McCook, Illinois 60525-3605 ?? 708.290.2100 ?? Fax 708.290.2200
Publicly Traded (AMEX: WGA), www.wellsgardner.com
You can find much more repair Info on Marvins pages Marvin 3M P2K Repair
8) The Monitor Schematics
These scans have been done by Martian Wiest in 2010.
I hope they help you fixing those monitors!
Wellsgardener Scan 1 wellsgardener01
Wellsgardener Scan 2 wellsgardener02
Wellsgardener Scan 3 wellsgardener03
Ducksan Scan 1 ducksan01
Ducksan Scan 2 ducksan02
Ducksan Scan 3 ducksan03
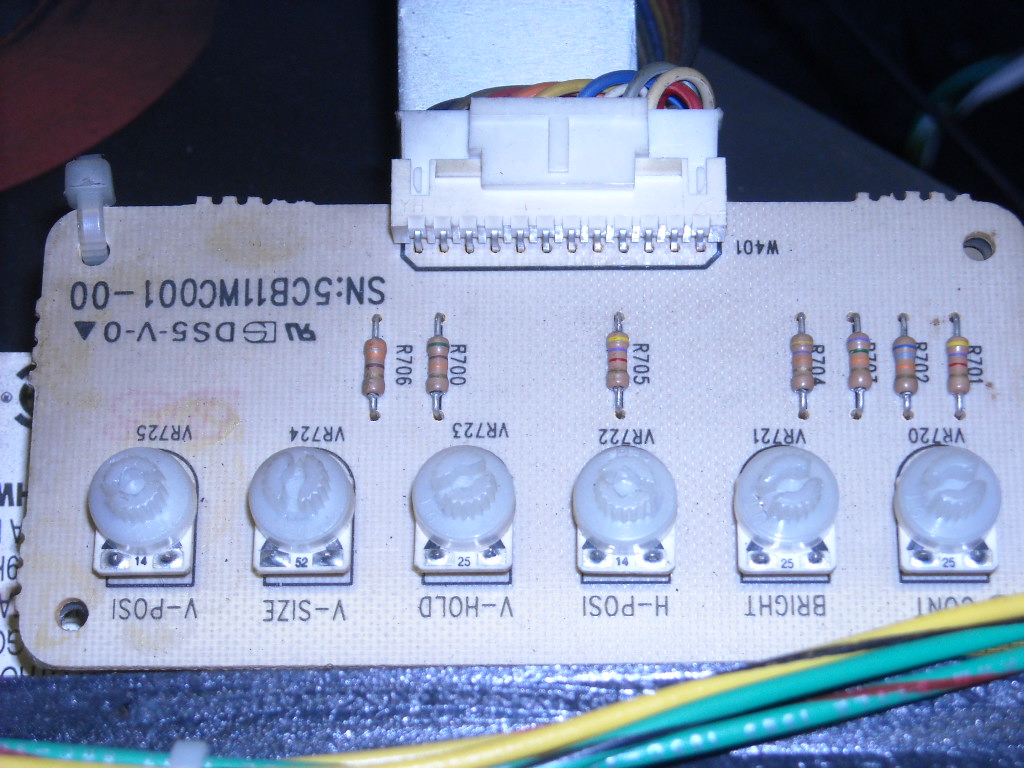
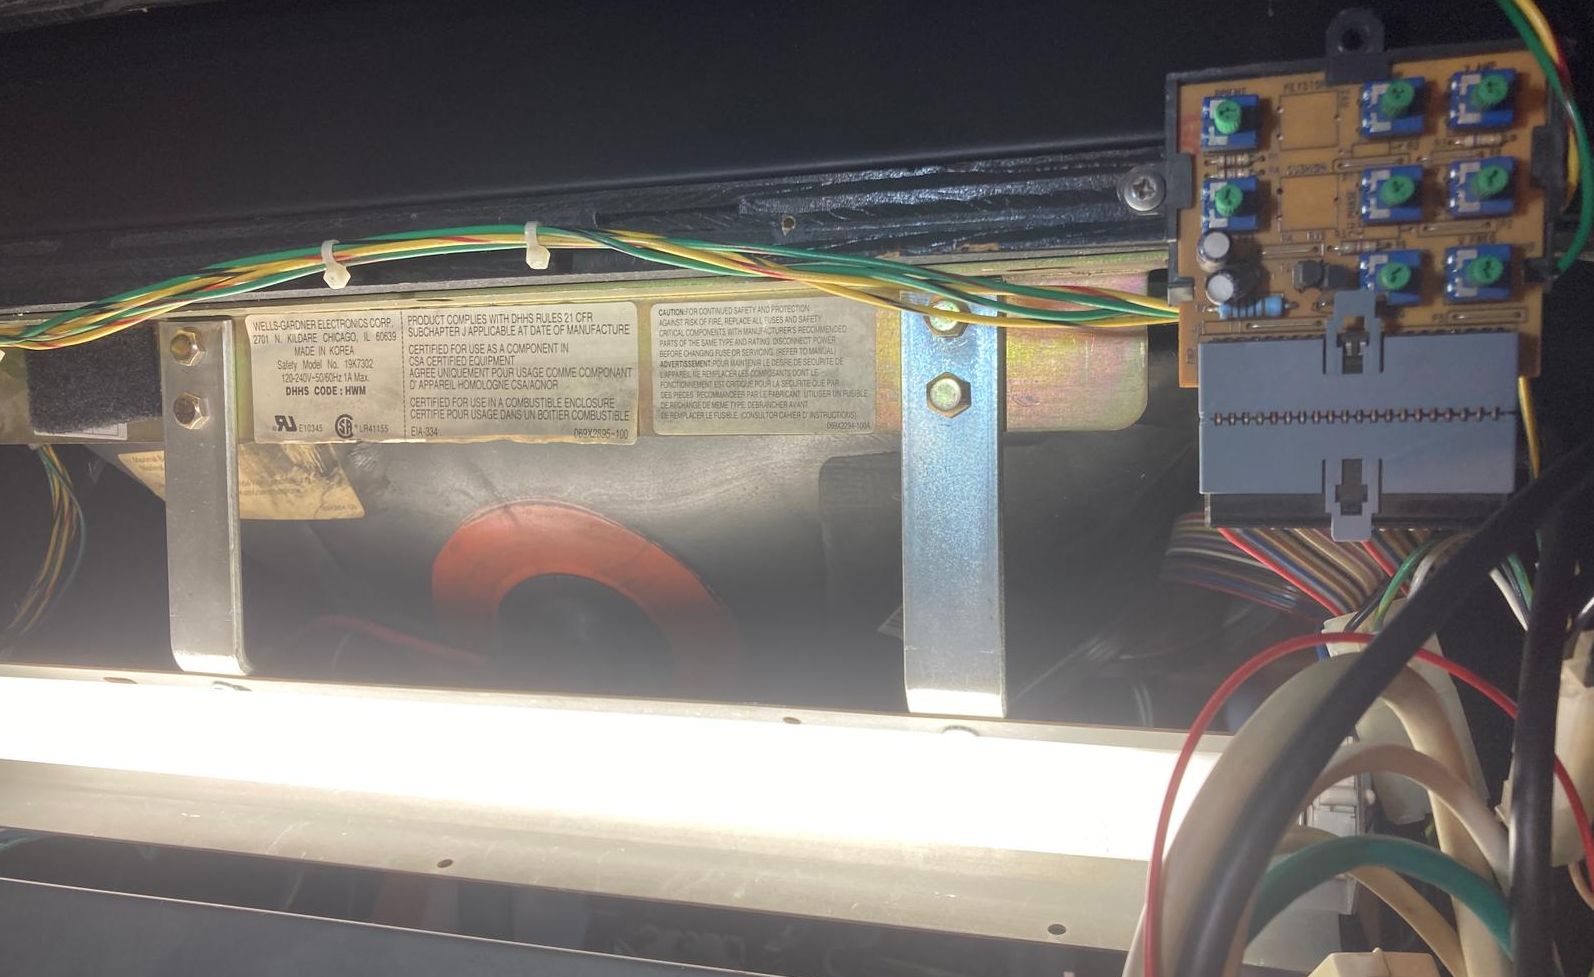
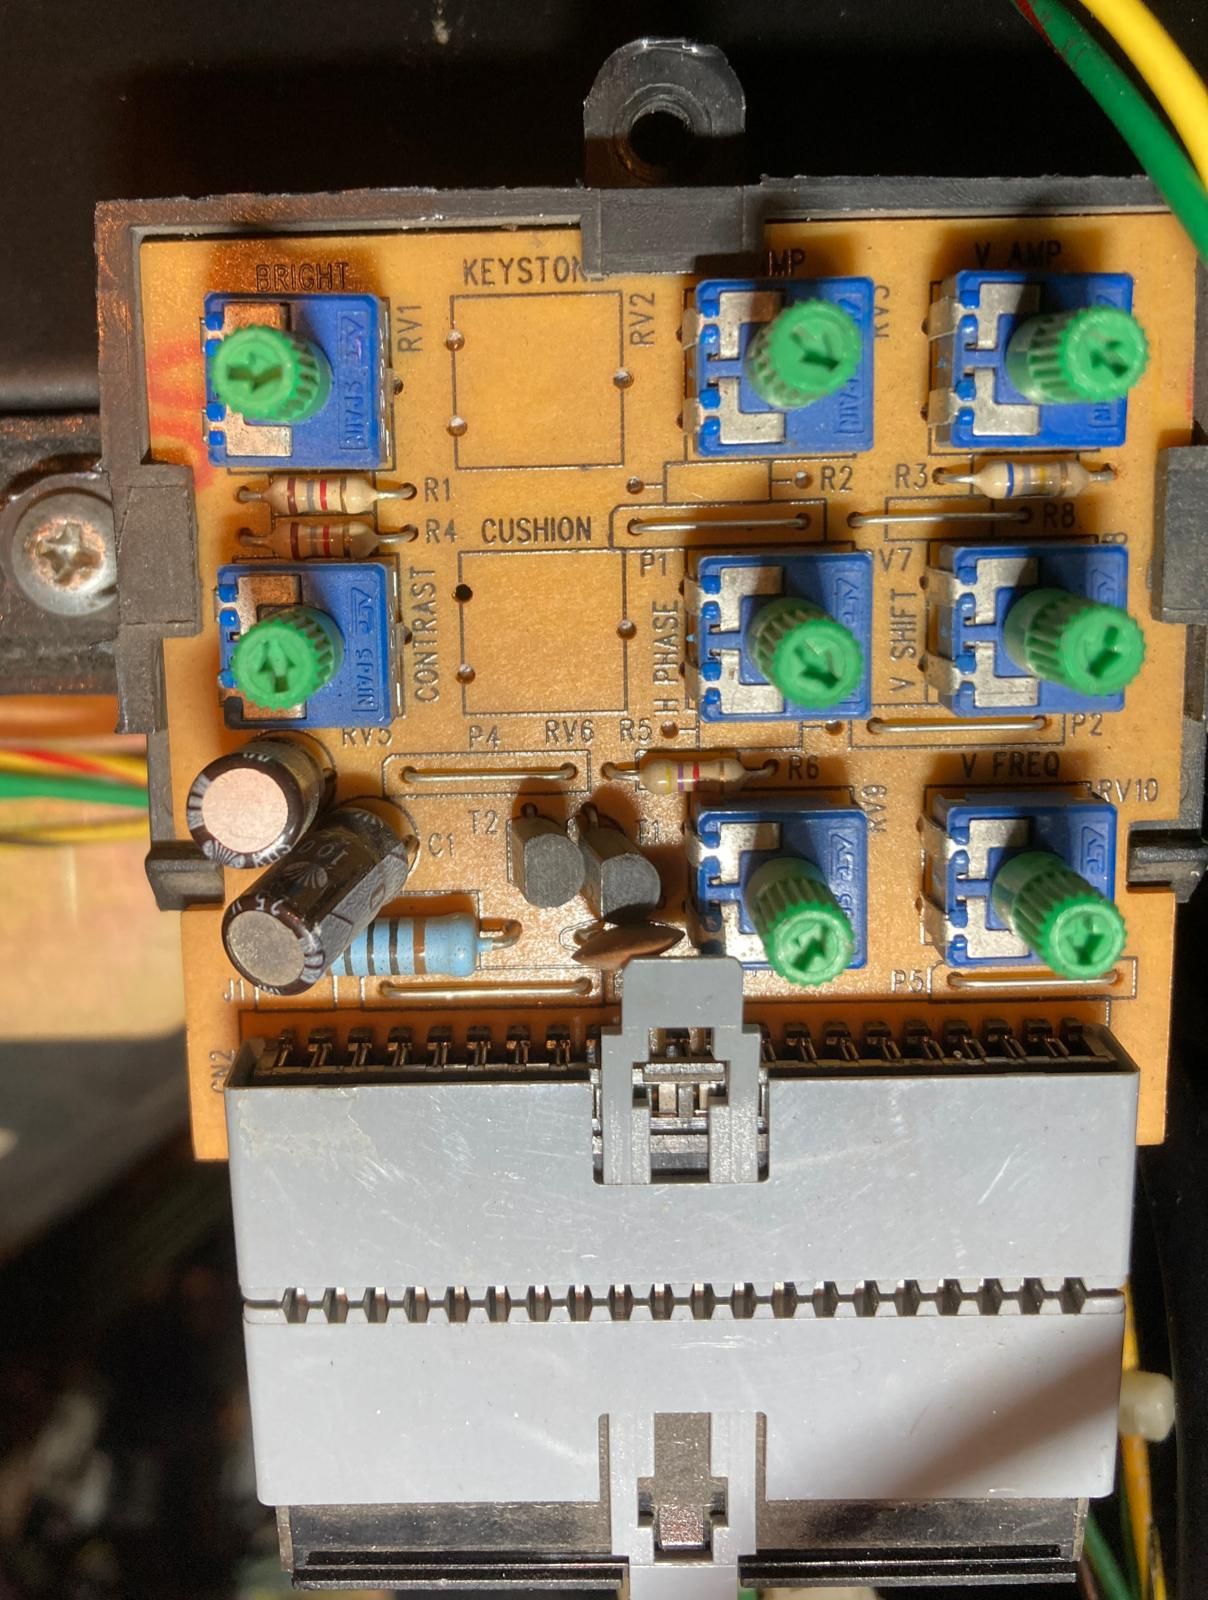
9) Wells Gardener Horizontal Shift Adjust Problems
This problem and it's solution has been reported by David aka 'Pinhead' from Belgium in 9/2014.
Problem on original Wells-Gardner CRT monitor:
The picture could not be perfectly horizontally centred, and it was positioned too far on the left side (player's point of view).
Even the trimmer for "H-POSI" did not work, because even at its maximal position, it was not enough.
Some elements of the picture is now off screen, which is not very beautiful and can even be annoying during game play.
What I did is shunting the R705 resistance (see schematics wellsgardener02 ).
This gives the opportunity to shift the horizontal position more to the right.
(BE SURE TO REMOVE POWER TO THE MACHINE BEFORE PROCEEDING !)
Here are two pictures (before and after).
WG before shift fix wgprefix
WG after shift fix wgafterfix
From David:
If you think that this could be helpful to other pinball 2000 fans,
please feel free to use these pictures and information on your website ... and so I did here.
10) Other variant of Wells Gardener 79K7302 found
Begin of 2024 Markus Pautz from Munich contacted me and said he found a different monitor in his RFM that the ones regulary seen.
Monitor top view
Markus reported, that he found a Wells Gardener 79K7302 in his RFM which has a different looking remote adjust module.
The adjust module has controls contrast, brightness, V amp, V shift and v freq + same for h
Remote control with green knobs
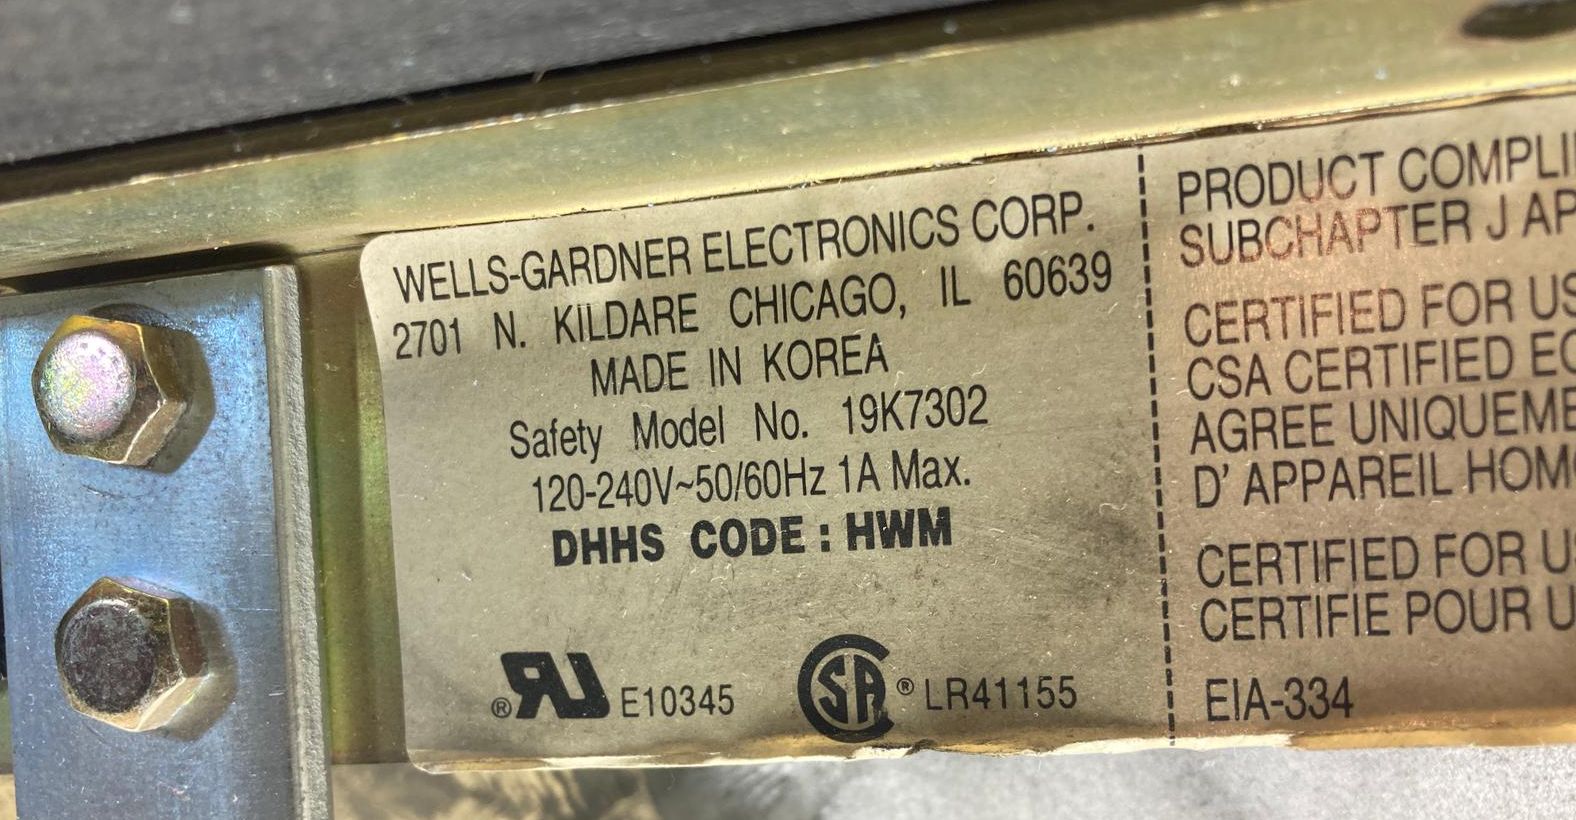
Monitor sticker says WG 79K7302 identical to other RFM and Episode I games Monitor sticker
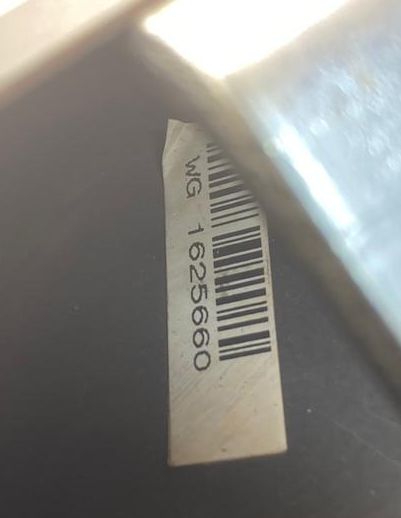
The Monitor serial sticker says WG 1625660
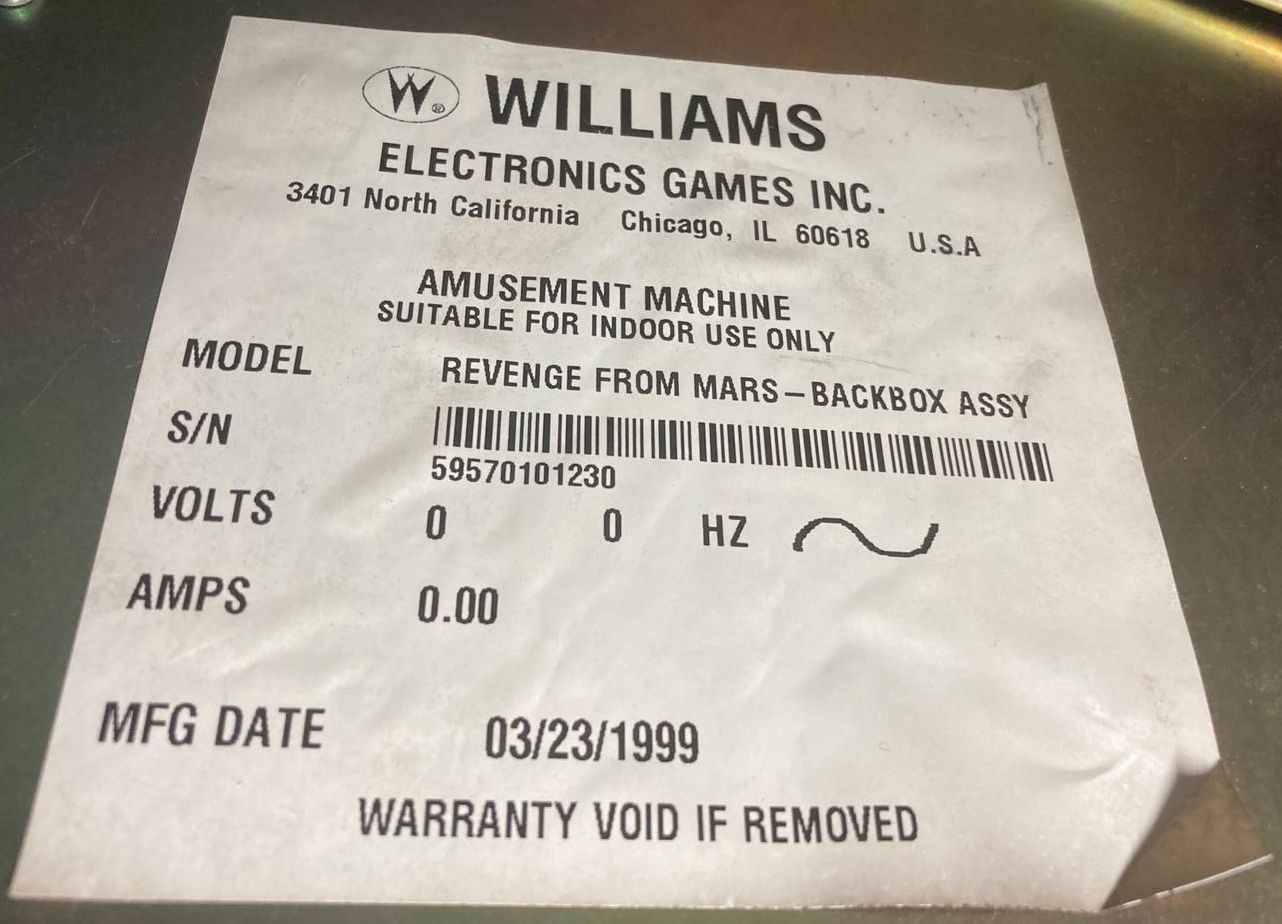
The head shows a very early production of RFM from March 23 Serial 59570101230
There are probably multiple more of these WG monitor out there, but at least for me its the first one which I ever saw.
| 